 |
The challenges in moving up to the Boeing 737 include the need for different procedures and management of complex systems; it's not the Cessna Skyhawk.
To get checked out in the Boeing 737, you'll need to learn some key items, settings, and procedures. Successfully planning your flight is the key to flying the jet. In this lesson, you'll take off, fly a simple flight with a few turns, and set up for a controlled descent and landing. You'll never be the same after that first landing. No, I don't mean you'll be hunched over and in need of a chiropractor, either. I mean you'll have such a big smile on your face that your neighbors will think you are trying to show off a new set of teeth.
|
About the 737–800 The 737–800 has a maximum weight at takeoff of 174,200 pounds (79,010 kilograms), measures 129 feet six inches long with a wingspan of 112 feet seven inches, and has a maximum height of 41 feet two inches (before our first attempt at landing it). The airplane cruises at 0.785 Mach (530 miles per hour), over a maximum range of 3,383 statute miles, at a maximum altitude of 41,000 feet, all while carrying 162 to 189 passengers. As every airline chooses their own configurations for seating, the number of available seats will vary from airline to airline, and from airplane to airplane. |
Basic Jet Procedures
To gain better understanding for flying the Boeing 737–800 in Flight Simulator, we will examine a variety of information regarding the airplane and its various flight configurations. This information includes airspeed settings, various flight profiles, and key flight instruments. We will organize the information following the common phases of flight. If you want a super-simplified approach to piloting the Boeing 737–800, see Quick Start.
Flight Profiles
Flight profiles refer to the configuration of the aircraft with respect to airspeed, power, pitch, flap position, and gear. It has nothing to do with how you look from the outside of the jet when flying and facing straight ahead. Each different phase of flight--takeoff, cruise, descent, approach, and landing--requires you to follow a specific profile. The key to a successful flight requires managing these settings. We will go into more detail on each of the different phases of flight and the specific settings used for the corresponding flight profile.
What is a Flight Profile?
Flight profiles are preset configurations used for the different phases of flight. Preset here means that an airline or aircraft manufacturer has established appropriate parameters that assure safe and controlled flight for a given phase. Typical phases of flight include takeoff, departure, level cruise, descent, initial approach, and the host of instrument approaches that the aircraft is certified to fly, such as ILS, VOR, NDB, GPS, CAT III, and so on.
Profiles tell the pilot how to configure and fly the airplane at each point of the flight and provide guidance during the transitions. Actual speeds and weights are not typically included on a profile where standard operational procedures dictate that the pilot look up these values in performance charts. Where speeds are "particular," they are listed on the profile. For the enjoyment of your lesson (and to keep your brain from exploding), we have included the minimum details necessary to facilitate your knowledge and understanding. Here are links to quick reference charts for different profiles discussed in this article:
Take time to review (and perhaps print) each of these profiles, and then have fun putting the information to use. Feel free to pause the simulator to your heart's content while you get used to interpreting the information, otherwise the overload of information may cause your heart to pause. Remember, these profiles have been put together to help simplify understanding and facilitate an enjoyable session flying the Boeing 737–800 in Flight Simulator. These profiles do not represent all issues, performance parameters, or any specific airline or manufacturer's published procedures. So have fun, and think of all that goes on the next time you fly a commercial airliner.
Takeoff
- Figuring takeoff weight
- Setting the flaps for takeoff
- Determining takeoff speeds
- Determining the flap retraction schedule (or speeds)
Cruise
- Choosing the final altitude and airspeed for
cruise
(either for the traffic pattern of route of flight)
Descent (more on this in ATP Lesson 2)
- Figuring out when to start the descent for landing
- Determining the landing weight
- Choosing the flap setting for landing
- Determining the "Vref (bug) speeds" for landing
Approach
- Speed management
- Aircraft configuration management
Landing
- Configuration changes
- Flying an ILS or visual approach pattern
- Greasing it on the centerline
- Stopping the airplane
Takeoff
Understanding Takeoff Weight
One of the key pieces of data for flying the Boeing 737–800 is its weight. The weight of the aircraft is used during several phases of flight to determine items, such as takeoff and landing airspeeds as well as flap extension or retraction speeds. As you blaze around the airways, you burn fuel. The more fuel you burn, the lighter the jet becomes. The key fact here is that your weight will decrease from the start of your flight through to the end.
The key weights you must know are the takeoff weight and landing weight. Each of these weights, combined with the outside temperature and density altitude, will be used to determine the proper airspeeds for takeoff and landing. Sounds complex? It can be, but we will make things very simple by using a few assumptions along with the Flight Simulator default settings for the Boeing 737–800.
|
The 737–800 has several weight limitations
Default aircraft weights in Flight Simulator
|
You might notice that the maximum taxi weight is higher than the maximum takeoff weight. This is to allow for the extra fuel you will burn taxiing around the airport and waiting in line for takeoff behind all those other aircraft that got there before you did.
Also, notice that the maximum landing weight is less than the maximum takeoff weight. This means that you cannot just decide to land immediately after takeoff; the airplane might be too heavy, so planning a longer loop back for landing may be required.
Zero fuel weight is the weight of the aircraft, all the baggage, and all the passengers but without any fuel on board. The zero fuel weight is important to know so that you can determine the actual weight of your aircraft at any time. Just add the current weight of your fuel to your zero fuel weight and your have your current weight.
The one variable you have easy access to in Flight Simulator is your fuel load. The Boeing 737–800 has three fuel tanks: left main, right main, and center tanks.
|
Default fuel loads for the Boeing 737–800 in Flight Simulator
|
|
Calculating your current fuel weight To figure out your current fuel weight, press ALT to bring up the main menu and choose Aircraft | Fuel or press the ALT+A+F. |
With these numbers, the total fuel weight comes out to be 46,063 pounds (20,894 kilograms). To figure out our airplane's zero fuel weight (which we will use as a base value later on) we subtract the fuel weight from the maximum takeoff weight of 174,200 pounds to arrive at 128,137 pounds (58,122 kilograms).
|
Simplify the Numbers If all this is too much math, you can simplify the numbers by
|
Takeoff Flaps: When to "Apply" Them, Not "Remove" Them
Commercial aircraft utilize different flap settings during takeoff based on weight, runway length, temperature, density altitude, and surface conditions. An involved process determines the optimum flap setting for any given takeoff (this may be one reason that airlines hire an extra pilot or two to help do some of the math). However, to simplify things, we will standardize on using a flap setting of five (5) for takeoff with the Flight Simulator default settings.
Takeoff Speed Management
Determining Takeoff Speeds
Speed management in the Boeing 737 is essential. The process used to determine the precise speeds during takeoff and landing can be complex and involve lookup tables (but not looking under them), aircraft configurations, weights, temperatures, and density altitudes—just to list a few. For our lesson, we will keep things simple by assuming outside conditions follow the "Standard Day" curve.
|
A Standard Day Standard conditions are considered 15 C at sea level and temperatures decreasing 2 C per 1,000 feet of elevation increase. |
V Speeds
For takeoff, we will be most concerned with three key airspeeds: V1, Vr, and V2. These three speeds form the collection called "V speeds." The key to selecting the correct V speed relies on aircraft weight, outside conditions, and the flap setting used for takeoff. Assuming the default Flight Simulator weight for the Boeing 737–800, "standard" conditions, and limiting flaps to a setting of 5, we can simplify choices to one set of values.
V1 is the takeoff decision speed. Based upon aircraft takeoff weight, temperature, and density altitude, you will need a certain size runway for safe takeoff. There is a point after you have set full takeoff power where you must decide to abort the takeoff or continue to fly. In the Boeing 737, this point is determined using airspeed and is designated as V1. On the takeoff roll prior to reaching V1 you should have the ability to cut the power, apply maximum braking, and come to a safe stop before reaching the end of the runway, thereby preventing your jet from becoming an impressive but awkward looking dirt bike. After accelerating past V1, you are committed to becoming airborne. Based on the assumptions made above, we will use 150 knots indicated as our V1 speed in this lesson.
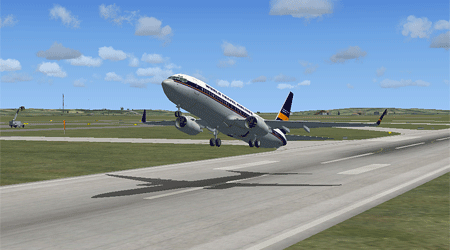
Vr is the rotation speed. This is the speed at which you ease back on the elevator, raise the nose to the appropriate pitch (+20 degrees), and lift-off. We will use 154 knots indicated airspeed as the Vr speed. One thing to consider about the Boeing 737–800 is that you can accidentally strike the tail on takeoff if you pitch up too aggressively at rotation, leaving you to make up a tall tale about the newly shortened tail. To prevent a tail strike, rotate to 20 degrees nose up at a rate no faster than 3 degrees per second.
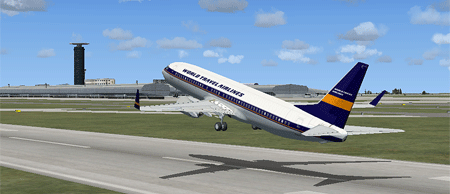 Figure 1-1: Just after takeoff rotation |
V2 is the minimum safe speed. Should an engine fail immediately after V1, you will have enough power to complete the takeoff with the necessary climb rate and terrain clearance. Because takeoff can be accomplished using a variety of flap settings, an airspeed of V2+15 knots is used as the two-engine climb speed to assure minimum maneuvering speed for all takeoff flap settings.
If you listened to a flight crew during the takeoff roll, you would hear the nonflying pilot call out the following items.
| "80 knots" | (Cross-check systems and assure everything is "in the green.") |
| "V1" | (Now past the point of no return—takeoff will continue) |
| "Rotate" | (Time to lift off) |
| "Positive Rate" | (The VSI and airspeed indicator both show a positive trend) |
| "Gear Up" | (Flying pilot commands the nonflying pilot to raise the gear) |
| "1,000 feet" | (The flap retraction altitude) |
Power Settings
So far we have reviewed the required speeds for takeoff in relation to our aircraft weight and ambient conditions. How do we set power so that the aircraft will accelerate or slow to our new target speed?
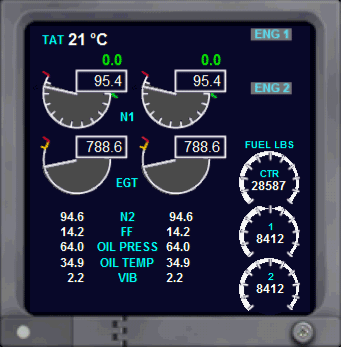 Figure 1-2: Engine gauges |
Power in a turbine jet aircraft is not measured in flat rpm (revolutions per minute) as with a piston powered aircraft. Power in a turbine engine is measured in percent of maximum rpm, where maximum rpm is the certified or rated power output of the engine. There are two points of measure important to the Boeing 737–800 pilot: the rpm of the low pressure turbine shaft—called N1, and the rpm of the high pressure turbine shaft—called N2.
N1 is the percent of maximum rpm of the low pressure turbine shaft of the engine. N1 is the value that best correlates to the power output of the engine. This is the value you set by moving the throttles to adjust your target airspeeds.
N2 is the percent of maximum rpm of the high pressure turbine shaft of the engine. This measures the speed of the tips of the turbine compressor blades. At any point of power production, the speed of the high pressure compressor fans should never exceed their designed maximum rpm limitations. Monitoring N2 enables us to guard against this.
In this lesson we focus on N1, and we use N1 percent to set power.
How to Take Off
Now that we have reviewed the weight, flaps, and target speeds, we are ready to take the runway and take off. Whether you start your flight lined up on the centerline of the departure runway or start at a gate, you will want to tune the radios and navigational aids, pre select any settings for the autopilot, run through your checklists, and set your flaps to 5 prior to receiving your runway and takeoff clearance from ATC.
|
Tips for use with default Flight Simulator settings
|
|||||||||||||||||||||
Regardless of how you arrived on the runway, it is always a good idea to have everything tuned, twisted, and configured, and to have in mind what you plan to do upon takeoff. Typical airline flights have aircrews that have been given a departure procedure as part of their IFR clearance. In Flight Simulator, it's just easier for you to add power and begin rolling down the runway. There are always some basic procedures to follow during a straight out departure, such as limiting airspeed to 200 knots below 3,000 feet and 250 knots between 3,000 and 10,000 feet.
You might also want to review (and perhaps print) the approach and landing quick reference tables: Takeoff
Airspeed Limitations
To follow actual airspace rules, a few speed limitations are important. In fact, you'll eventually be tested on a few of them in your ATP checkride. If you are departing a Class B airport, your airspeed must remain at 250 knots or below under 10,000 feet. For Class C or Class D airports, you must limit your speed to 200 knots within the airspace (usually 2,500 feet within 4 miles of the airport) and then limit to 250 knots until reaching 10,000 feet. These limitations should be helpful in understanding the need for all the "scripted" procedures required during takeoff. For more information about airspace definitions, see the Glossary and the articles on Air Traffic Control.
Cleared for Takeoff
Once you have the airplane all set up and configured, and you've received your takeoff clearance, increase the throttles to a power setting of 40 percent to 50 percent with the brakes set. This is often called "standing up the throttles" and serves two purposes. First, this allows you to scan the engine instruments to make sure everything is functioning and "in the green." (Well, almost everything … you don't want your copilot to be green!) Second, this pause enables the engines to spool up to an intermediate level without overheating or overstressing the brakes while you scan the gauges. With both engines producing equal power and everything clear and in the green, release the brakes and set takeoff power to 95 percent of N1. You'll notice that the throttles are much more sensitive than in the Cessna Skyhawk SP or Beechcraft Baron 58. Rather than advancing the throttle all the way to full, try advancing them to about three quarters of the way to their full travel and slowly increase them to reach 95 percent of N1. Or, advance the throttles to full, and then back off some so not to exceed 95 percent.
Vr—Rotate
Your next task is to monitor the speeds as we accelerate down the runway on centerline. Our first speed to review is V1, the go/no go decision point. Ask yourself if all systems are okay. If so, then continue. Vr, our rotation speed comes next. At 154 knots, ease back on the elevator and lift off. Begin your pitch up to 20 degrees nose up at a rate of about 3 degrees per second. Some quick math tells us that it should take about six and a half to seven seconds to reach 20 degrees nose up pitch attitude.
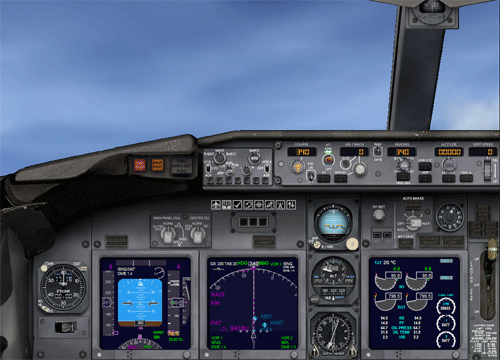 Figure 1-4: The instrument panel soon after takeoff rotation |
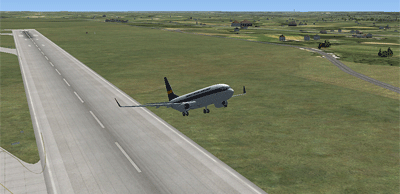 Figure 1-5: The same position after takeoff rotation seen in spot plane view |
Positive Rate—Gear Up
As you pitch up to 20 degrees with the wings level, scan the vertical speed indicator and the altimeter. When both instruments indicate a positive trend upwards (the needles moving up in the direction you want) we have a "positive rate of climb" and can safely retract the landing gear. Without establishing a positive rate, you do not want to retract the gear because you are too close to the ground and could inadvertently settle back to the runway for a variety of reasons—wind shear, rotation at too slow a speed, or too high a pitch attitude, alien force field (just kidding) to list a few. Retract the gear by pressing either the G key or the appropriate button on your joystick.
Retracting the Flaps
On the initial phase of a departure, airlines follow an initial profile to guarantee terrain and obstacle clearance and sufficient climb performance in case of engine failure. To follow a similar procedure, you will want to be 400 feet above ground, with flaps still set at 5, and maintaining a speed of 180 knots. Your rotation rate to a pitch of 20 degrees nose up should take care of this. The second key element of the initial departure profile is to climb at an adequate rate of climb and airspeed until reaching a safe altitude of 1,000 feet above ground level (AGL). At this point it is now safe to begin the after takeoff process.
After reaching 1,000 feet AGL, follow the flap retraction schedule as shown on the Normal Takeoff profile. By 1,000 feet AGL you should be climbing at or above a speed of V2+15 (162+15). According to the schedule, it is now safe to begin flap retraction. Initially retract flaps from a setting of 5 to 1 by pressing the F6 key twice. Set the climb power to 90 percent N1, pitch down to 15 degrees nose up, and accelerate. Above 2,500 feet AGL lower the nose to 10 degrees to 12 degrees nose up and accelerate up to 250 knots. As you accelerate through 200 knots, finish flap retraction. You might also want to follow the After Takeoff checklist.
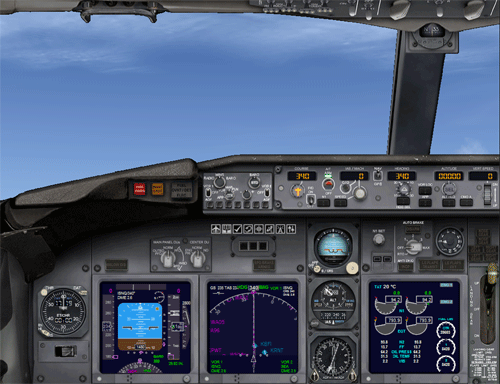 Figure 1-6: The instrument panel after retracting flaps and obtaining 12 degrees nose up pitch |
Cruise
Departure Climb up to Cruise Altitude
Maintain a 10 degrees to 12 degrees nose up pitch and 250 knots with power set at 90 percent N1 until passing through 10,000 feet. At this point, lower the nose to a pitch of 6 degrees nose up and accelerate to between 280 knots and 300 knots. As you climb through higher altitudes, the air becomes less dense and performance changes. Keep an eye on your power setting of 90 percent N1 and make necessary adjustments to maintain 90 percent. As you climb through the higher altitudes, you may need to lower the pitch to 5 degrees to 6 degrees nose up in order to maintain a 280 knot climb speed.
|
Flight Levels When you pass through 18,000 feet you enter the "flight levels." Flight levels are identified with "FL" preceding the altitude with the final two zeros removed. So, FL180 is 18,000 feet flight level. Above FL180, remember to reset your altimeter to 29.92 inches. The interactive lessons assume standard pressure, so no adjustments are made. However, ATC will assume you made this adjustment to the altimeter; if you don't, you won't be on your assigned altitude. Adjust the altimeter by turning the Baro knob on the altimeter with the mouse. |
As you approach 1,000 feet prior to your target cruise altitude, lower the nose and maintain a climb rate of 1,500 feet per minute (fpm). As you pass through 150 feet prior to cruise altitude, begin your level off by pitching the nose down to 2 degrees nose up attitude and simultaneously reducing power to 70 percent to 72 percent N1. Remember to retrim the aircraft for level flight. Now you can engage the autopilot to maintain heading/course, altitude, and airspeed, however, I always like to hand fly the Boeing 737 on my shorter flights. For long haul flights, the autopilot will work handier for you than even your copilot. But it won't get you a cup of coffee.
Descending
We have covered the fundamental points involved in getting you airborne and leveled off at cruise altitude. Now you're wondering how you can descend and be in the right place at the right speed and altitude for landing. I've got an entire lesson for you on descents in ATP Lesson 2. But here's a brief overview to help you in this jet checkout lesson.
When it comes time to begin a descent, you must complete several important tasks in order to be at the right place, at the right time. Prior to beginning the descent, air crews must complete the following.
- Plan when to start descent.
- Get the ATIS and other information relating to the approach and landing.
- Calculate the estimated landing weight of the aircraft.
- Determine the flap setting and Vref speeds for landing.
- Determine the appropriate landing runway and corresponding approach.
- Brief the crew on the specifics of the approach.
- Complete the Descent checklist.
How Fast is Too Fast?
Speed control is one subtle piece of the equation. There are two places you will need to modify your profile to keep your speed within parameters: during descent as you descend into thicker denser air, and at the level off point where you may need to start slowing down to meet any assigned speed restriction, for example slowing to 250 knots.
As you descend into thicker air, your indicated airspeed unit of measure will change from a percent of the speed of sound (Mach) back to nautical miles per hour (knots). You can determine this threshold by noticing the red and white striped pole or needle—known as the "barber pole"—displayed on the upper left side of the airspeed indicator. This needle marks the never exceed speed for the aircraft. During descent, the barber pole increases toward the needle of the airspeed indicator and left unattended, will eventually cross paths. Should this happen, you will have an overspeed condition as heard by the "clicking/clacking" audible warning (to say nothing of the gurgling and nail scratching sound from your copilot). To avoid this, reduce N1 to 45 percent and maintain 310 knots to 320 knots during the remainder of your descent.
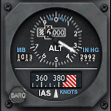 Figure 1-7: Overspeed indicator |
As you descend from cruise altitude, you will be storing up momentum as you descend at well over 300 knots. All this works against you as you reach your target point and need to slow down. The fix is easy … and I don't mean you have your passengers stick their hands out the windows, either. During your descent planning, allow for an additional 5 nautical miles to level off and slow to your target speed at idle (yes, we can pull the throttles all the way to idle in a jet without having to worry about shock-cooling the engines as we did in the Baron). This might mean descending at nearly 300 knots, but then leveling at or above 10,000 feet, reducing power to flight idle, and coast in about 5 nm to bleed off speed until you reach 250 knots. At 250 knots, increase throttles to 52 percent to 55 percent N1 and maintain your 250 knots.
|
Remember to Reset the Altimeter As you descend below FL180 (18,000 feet) you must reset your altimeter from 29.92 inches to the local pressure setting. |
As a last resort, you can always deploy the spoilers (speed brakes) by toggling the SLASH (/) key on or off. With careful planning you should be in fine shape for your approach and landing profiles.
Planning for the Approach
ATIS
The important elements to extract from the arrival airport's automatic terminal information service (ATIS) are: the local weather conditions, the local altimeter setting (what you'll set your altimeter to when descending below FL180), the active runway, and any local airport equipment limitations or runway/taxiway closures. Use this information to prepare for the approach.
Landing Weight
Descent planning is usually done 100 miles to 120 miles and approximately 20 to 25 minutes from landing. To estimate your landing weight, press ALT+A+F to get your present weight of fuel. Above 25,000 feet, a fair estimation is that you will burn 1,700 pounds of fuel during the remainder of your descent, approach, and landing. So subtract 1,700 pounds from your present weight. Next, add 100,000 pounds to this number to arrive at your estimated landing weight.
Landing Flaps
The selection of the desired setting for landing flaps is based upon a variety of issues including runway length, approach characteristics, runway condition, prevailing weather, and fuel efficiency. Following the theme of keeping it simple, we will standardize on using a flap setting of 30 for all our landings in the lessons.
Landing Vref Speeds
During approach and landing, you will reduce airspeed along the way and never want to fall below the minimum airspeed for your current configuration. You always want to feel well grounded as a pilot, but not because you smacked the airplane onto the ground by not flying fast enough. For approach and landing, we are concerned with maintaining proper airspeed for the given flap setting and aircraft weight. If you are flying too slowly, the airplane will be difficult to control, or worse, could stall and contact the ground earlier than planned. Just like takeoff, there are predetermined airspeeds that will provide optimum performance and protection against stalls and other undesirable events. The airspeed that constitutes this threshold between controlled flight and less-than-controlled-flight is referred to as "Vref."
An additional 5 knots is added to this reference speed for added safety and best performance. So, once a Vref speed is determined given the aircraft's landing weight and desired flap setting for landing, the final approach landing speed will be Vref plus 5 knots. An additional 10 knots may be added (on top of Vref+5) to adjust for situations such as strong cross winds or potential wind shear. (Are you starting to think that flying that Skyhawk SP wasn't so bad after all? No one would blame you if you did. This is challenging but it's the way flying jets is done.)
So when is all this figured out? During the descent planning phase, the flight crew calculates landing weight and chooses a desired flap setting. With the weight and flaps setting determined, the appropriate Vref speed can be identified.
|
Tips
|
Approach Briefing
Now that you know the local airport conditions, the local altimeter setting, and the expected active runway for arrival, you can begin to get organized for the approach. Now is the time to review the chart for the designated approach.
You most likely will not be tuning the radios and inbound courses at this point. This will be done when it is time for the Approach checklist. We still need to follow a standard arrival procedure or follow ATC instructions as the controllers vector us down from cruise altitude.
The Approach
We've covered the basics of descent planning and speed control, so now it's time to transition into the airport environment. I offer an entire lesson on flying an ILS approach in ATP Lesson 3; here's an overview to get us to the runway. If you are flying using the ATC features in Flight Simulator, you will be radar "vectored" (given specific headings to fly) onto the final approach course. If you are flying on your own, you will need to plan to be at a certain altitude, speed, and heading in order to successfully intercept the final approach course properly configured.
A rough rule of thumb for this approach transition is to plan on being 3,000 feet AGL at 10 nautical miles from the airport with the airplane properly configured and established on the localizer or VASI. Approaching this 10 nautical mile point you want to be slowed to no more than 170 knots with flaps set to 5. As the glide slope "comes alive" you will want to extend the gear, increase flaps to 15, and slow to 150 knots. At 3,000 AGL and 10 nautical miles out, you should be close to intercepting (if not already on) the glide slope. Keep in mind that these are approximate altitudes and distances to place you close to a 3-degree descent path for final approach. At the final approach fix (FAF) set flaps 30 for landing, power to 53 percent to 55 percent N1, and fly the glide slope down to a smooth landing.
You might also want to review (and perhaps print) the approach and landing quick reference table: Straight-in Visual Approach.
Landing
Once you are established on the localizer with the glide slope indicator "alive," configured with the gear down, flaps set to 15, and slowing to your target speed of 150 knots (or the appropriate Vref speed for your weight if you are going to that level of detail). You are ready to intercept the glide slope and fly it on down to the runway. At a point where the glideslope needle moves to one dot above center, set final landing flaps to 30 and set your power to 53 percent N1. Begin your pitch down to 0 degrees and monitor your position left or right relative to the localizer and high or low relative to the glide slope.
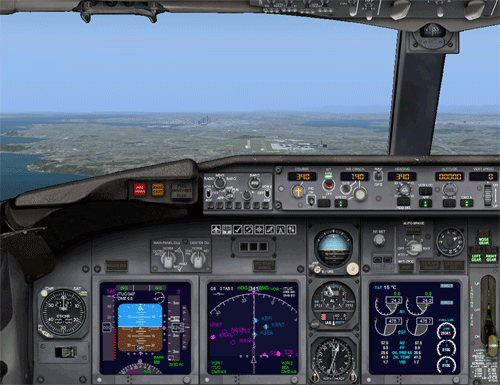 Figure 1-8: Landing approach from the cockpit |
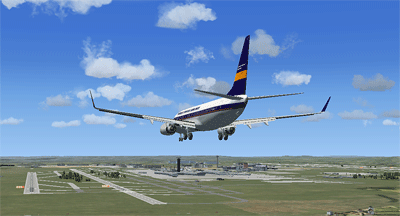 Figure 1-9: The same landing approach seen in spot plane view |
The Final Flare and Landing
As you cross the threshold of the runway for landing, reduce power to idle and begin a smooth pitch up to 3 degrees. This is called the "landing flare." Hold this pitch setting as you bleed off the remaining airspeed and you will settle on the runway. Do not stop your small control corrections to keep lined up with the center line as you flare; fly the plane all the way down to the runway. Remember to line up the runway centerline with the letters "GPS" on the glare shield to keep tracking the centerline on touch down. Avoid the tendency to stare at the ground immediately in front of you. Transition your view to the end of the runway. As the main wheels touch, lower the nose wheel slowly. Apply reverse thrust (press and hold the F2 key) and the brakes (press the PERIOD [.] key) to slow down and exit the runway at the next available intersection. You can also engage the autobraking features to further assist you in bring the aircraft to a stop after touchdown.
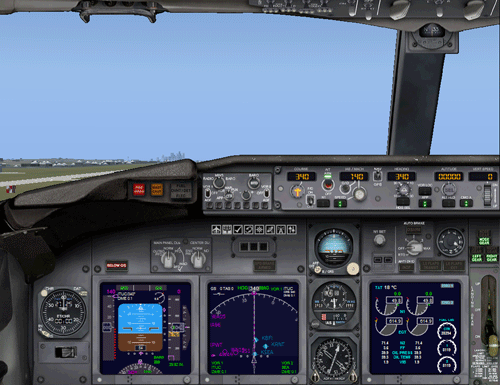 Figure 1-10: Final landing flare from the cockpit |
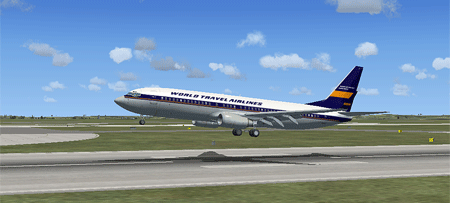 Figure 1-11: The same final landing flare seen in spot plane view |
And there you are. Now you're a captain, or at least closer to it. You've learned a lot, but there's a lot more to learn. You may have to review this lesson several times before becoming intimate with all the information contained therein. That's okay; I'll be here for you when you return. If you feel up to it, give the flight lesson a go. Most important, make sure to have fun in the process of learning.
You might also want to review (and perhaps print) the approach and landing quick reference tables: Landing in a Traffic Pattern and How to Land an ILS Approach.
|
Helpful ATP Hints
|
Ok, see you in the cockpit. Click the Fly This Lesson link to practice what you just learned.