—by Rod Machado
One of the greatest pleasures a flight instructor can have is to solo a student. Since you are my student, I have the great pleasure of soloing you in this lesson.
This is the time in your training where you get to test your mettle in the metal as you take the Cessna 172 around the airport for a single traffic pattern circuit by yourself. Alone. Individually. Unaccompanied. Solo.
Let's be clear about how solo works. You'll fly on your own, without any direct help from me, your instructor. It doesn't mean that you fly closer to the ground, as in flying "so low," nor does it mean you'll sing without musical accompaniment in the airplane, although you're certainly welcome to do so if you feel inspired. How you elect to amuse yourself when I'm not with you is your business. I'd like to offer for your consideration that great opera classic, "O Solo Mio."
In this lesson your flying performance will be entirely up to you. I will, however, be talking with you via the radio, so I can, in a manner of speaking, air-wave to you.
To make this lesson meaningful, I'll provide the directions on when and where to maneuver the airplane. All you have to do is apply the aviation knowledge you've already acquired. Since I'll be speaking with you via radio, I'll tell you when you're cleared for takeoff and give you headings and altitudes to fly that should bring you back for a landing. . . at the same airport from which you departed. I will take you to the left around the airport, in a rectangular traffic pattern, eventually aligning you with Runway 19 for landing.
You'll start this lesson by holding in position on Runway 19 at Bremerton airport. You might hear the distant sound of a jackhammer before departure. Don't worry, no one is repairing the runway. It's only the sound of your heart beating, and this is quite normal. This is an exciting event and you should be excited. When we're ready, I'll have you release the brakes, apply power and accelerate. At 55 knots you'll rotate the nose to an initial climb attitude of 10 degrees (Figure 7-1).
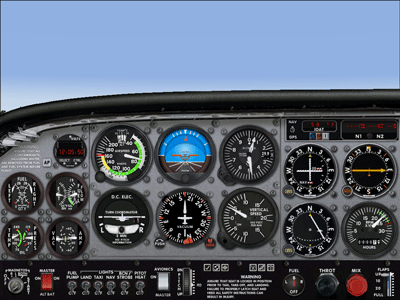 Figure 7-1 |
Thereafter, you'll make slight adjustments in pitch to give you a climb speed of 80 knots.
At this point, if you wanted to bellow out a few words to "Please Release Me," this would be appropriate and no one would fault you. So have at it.
You'll climb out at 80 knots on a heading of 190 degrees (Figure 7-2) to 1,500 feet, where you'll level off.
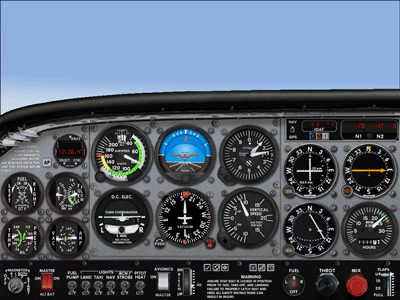 Figure 7-2 |
You'll want to adjust your power to keep your airspeed below 100 knots and make sure the airplane is properly trimmed. Remember, an untrimmed airplane means you must use excessive muscular force to fly the airplane. If you want to build big biceps, do it in the gym, not the airplane. Never fight with your airplane.
During this solo, I'll expect you to maintain your altitude within +/- 100 feet; your airspeed within +/- 10 knots; your heading by +/- 10 degrees and any requested pitch attitude within +/- 3 degrees. I'd also like you to make all turns at no more than a 20 degree bank. So try and keep your bank angle within +/- 10 degrees of 20 degrees. At this point in your training, I know I can bank on your skill at doing this… unless I'm nuts, in which cash I'll cashew in.
Once you're level at 1,500 feet and the airplane is stabilized in level flight, I'll have you make a 90-degree turn to the left, to a heading of 100 degrees (Figure 7-3).
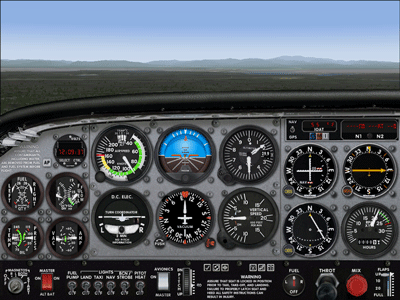 Figure 7-3 |
This is called the crosswind leg of the traffic pattern, which we'll talk about later in the Private Pilot lessons. Keep in mind that the runway is somewhere behind your left shoulder at this point. Unless you have an old-but-serious football injury that resulted in both shoulders now being on the right side of your body, you should be able to look to the left and see the runway (Figure 7-4).
 Figure 7-4 |
If you'd like to look for the runway, look outside.
|
To look outside the airplane
For simplicity's sake, I'll refer only to the numeric keypad method from now on. |
When I give you the cue, I want you to make another 90 degree turn to the left to a heading of 010 degrees. This will have you flying in the opposite direction of takeoff, with the runway somewhere off your left (Figure 7-5).
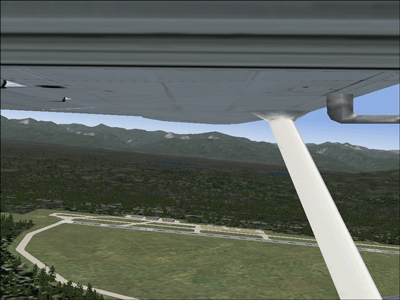 Figure 7-5 |
Since we took off into the wind, you'll be flying downwind at this time. That's why this leg of our circuit is called the downwind leg. Don't you wish calculus was this easy? Press 4 again on the numeric keypad, and see if you can find the runway.
When the airplane is abeam the runway's landing threshold (meaning the runway numbers at the beginning of the runway on which you'll land are directly off your left wing as shown in Figure 7-6), I'll want you to add 10 degrees of flaps in preparation for landing.
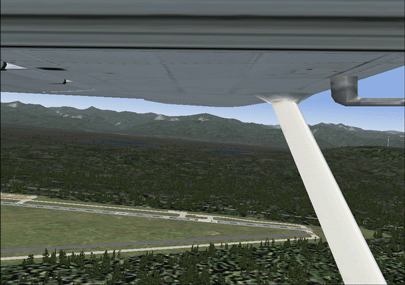 Figure 7-6 |
Don't worry about adjusting the power here. Just apply the flaps and adjust the pitch to keep the airplane level at 1,500 feet. Then use a little trim to take the pressure off your joystick. Let the airspeed decrease a bit. I'm not worried about having you maintain a specific airspeed at this point.
One of the most important things about applying flaps at this position is that it allows you to have a better view over the airplane's nose. This is a good thing, because if you're going to land it's very helpful to be able to see the runway. In a real airplane, applying 10 degrees of flaps helps pilots who are "vertically challenged" to see over the airplane's nose. I've had many young students (and a few older ones) who weren't yet done with their growth spurt, and they really appreciated what flaps did for them. It sure beats having to ask the flight school for a booster seat.
As long as the airplane is below 110 knots you can apply 10 degrees of flaps without worrying about them coming off the airplane. Applying flaps at too high a speed can damage them. This would cause a flap, might hurt you and the airplane, and can result in just enough tragedy to inspire someone to write a country-and-western song about you.
Now you're nearing the position where you'll make another 90 degree turn to the left. When it's time, I'll instruct you to turn left to a heading of 280 degrees as shown in Figure 7.
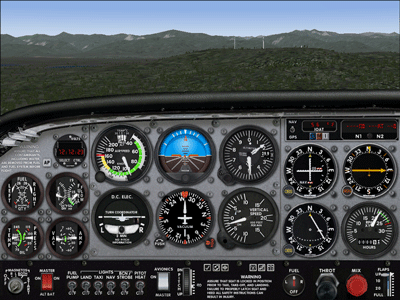 Figure 7-7 |
Make the turn at 20 degrees of bank and keep the airplane in level flight until I tell you to begin a descent for landing. This position establishes a base from which we'll prepare to land the airplane. This is why this leg of our pattern circuit is called base leg. I seem to have an answer for everything, don't I? This almost got me in trouble when I was a kid. I was talking back to my grandpa when he said, "Hey, you've got an answer for everything, don't you?" Of course, I immediately replied, "No I don't." That night I caught him trying to erase my name from my birth certificate. Ouch!
When you're in position for the final turn, which aligns you with the runway, I'll give you the cue to make a final 90 degree turn, to a heading of 190 degrees (Figure 7-8).
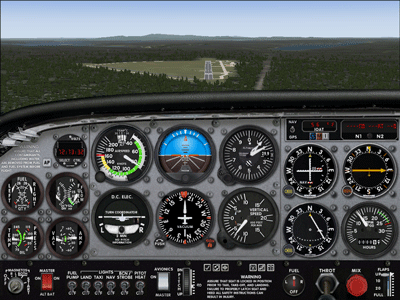 Figure 7-8 |
This will align you with the runway and put you on what is known as the final approach course. You should see the runway directly ahead of you (Figure 7-9). At this point you'll have to decide when to begin slowing the airplane down and starting your descent for landing. Do whatever you need to do with the power and flaps to land this airplane just as you've done in previous lessons. I'm leaving all this up to you since this is your first solo flight. Make sure to use the PAPI to help you remain on the glide path.
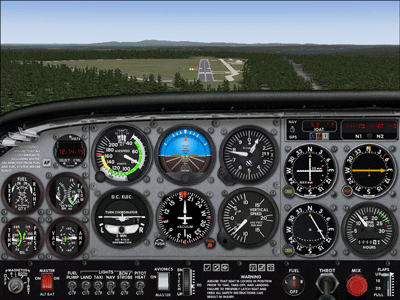 Figure 7-9 |
If this were a solo in a real airplane, you'd see a little bitty fellow standing by the side of the runway cheering you on. So just imagine that you see me down there waiting for you to arrive and land safely. I won't be saying much from here on out. You're on your own...So, whatever you do, don't start singing the lyrics from an Elvis song: "I'm so lonely I could cry."
When you land, you'll hear me congratulate you on a job well done. I will, of course, expect you to do a few lines from Frank Sinatra's "I Did It My Way" while whistling the theme from "Top Gun."
|
Solos and Shirttails No one knows the origin, exactly, of when it became the custom to cut the shirttail off of a fledgling student pilot's shirt, but it's a tradition that's still practiced by thousands of instructors on the occasion of the student's first solo flight. Some say it's from the old days of open tandem cockpits, where the instructor sat in the rear seat and the student sat in the front seat. To get the student's attention, the instructor would lean forward and tug on the student's shirttail. Solo flight equals no instructor, hence, no need for shirttail tugging. It's a fun custom, and there's nothing that brings more pride to me as an instructor than when I'm watching a student pilot take to the skies alone for the first time. Now, it's your turn to solo. Get out there, make me proud. If you're successful, then print out your solo certificate at the end of your flight. You'll see that it's an image of a torn shirttail commemorating this exciting event. |